Asking a student to retell a story or summarize a non-fiction text in their own words can be one of the most difficult skills a primary teacher faces. It’s like every word a student read just two or three minutes prior washed out of their brain. Like seriously? Where did it go? But, summarizing text is important. Being able to retell a story, text, passage- verifies that a student can comprehend what was being conveyed in the text. It also aids in understanding big picture ideas like theme, main idea, and author’s purpose. Skills that tend to allude our learners even in the older grades. So we know summarizing is essential for comprehension, but how can we teach such a difficult skill to our primary learners?
One of the best ways I’ve found to combat the “ummmm” stares from kids when asked to summarize a text is to scaffold, model, and practice using a summarizing routine. So today, I’d thought I’d share that routine with you!
Please note that this post contains affiliate links. To understand how affiliate links work and how I use them to upkeep this site, please click here.
Summarizing with Predictions
So many times we assume that summarizing a text can only begin after we read it. But, you can prime students for success by having them make a simple prediction before they even read a single word! The first step in the summarizing routine is to show students how to make a prediction. Before reading a passage, have students read the title and glance at the pictures. This should only a take a minute. Then, have kiddos make a prediction as to what they think the text will be about. This could be written down near the title or shared verbally with a buddy. By engaging a student about the “big picture” before they even jump into the text, you’re setting students up for a better understanding of what the whole text is about.
It’s kind of like seeing the stage and the front of the playbill before the show. If the title is Knight in Shining Armor and there’s a castle and a dragon painted into the background, you can assume a lot about the who and what of the show.
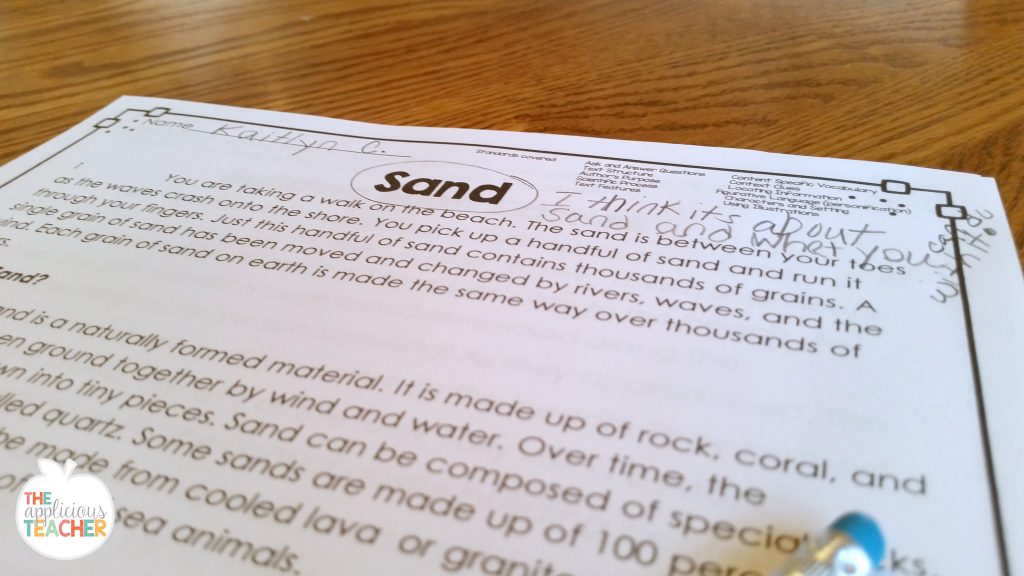
Here you can see how one of my seconds used this strategy on a reading assessment. Before starting, she glanced at the pictures and read the title. Then, she wrote a quick prediction as to what the text would be about. Then, as she read, she was able to check her understanding of the text based on her prediction. Did I mention she scored an “A” on this assessment? #score #happyteacherheart
Summarizing with Important Words
Now that your students are primed, have them read the text. Just once. You can read it as a class, have students read it with a buddy, or quickly read the text on their own. After students have read through the text, they are ready for the next step in the routine!
Have students brainstorm the important words. This is great for early readers (as it builds an understanding of content vocabulary) but it also works to orientate mature readers as to what was important in the text. It could just be a few stand outs or a list of ten to 15 words. The number of words varies depending on the length of the text, the complex vocabulary, and student comprehension.
T EACHER TIP- if a student struggles to identify even a few important words from a text, then they did not comprehend the text. Students should either reread the text or read a lower leveled text. If no lower level version of the text is available, scaffold your reader’s success by pairing the student with a buddy, or reading the text out loud to the student. The goal is that students understand how to summarize a text. Work with what you got to get the there. “
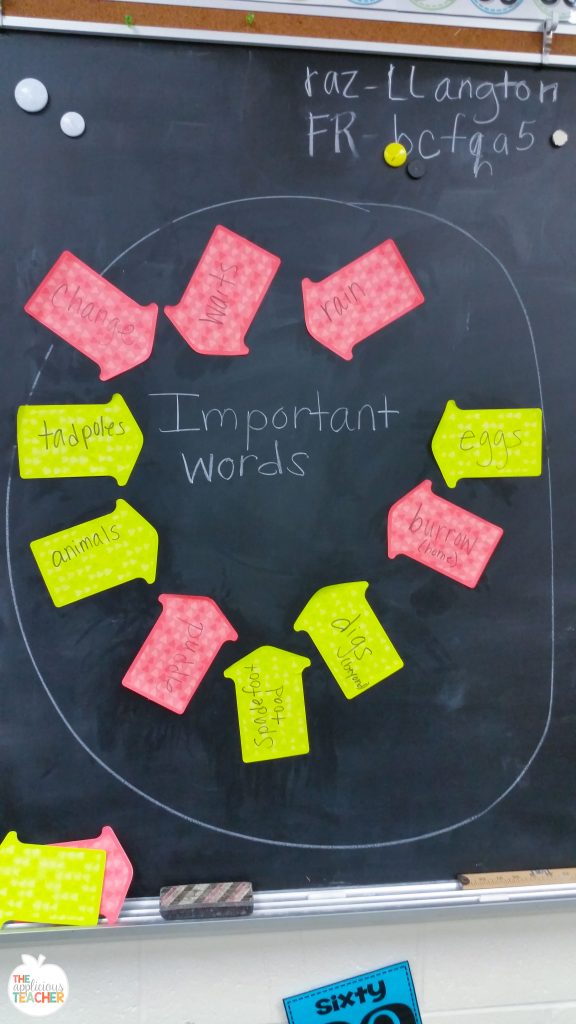
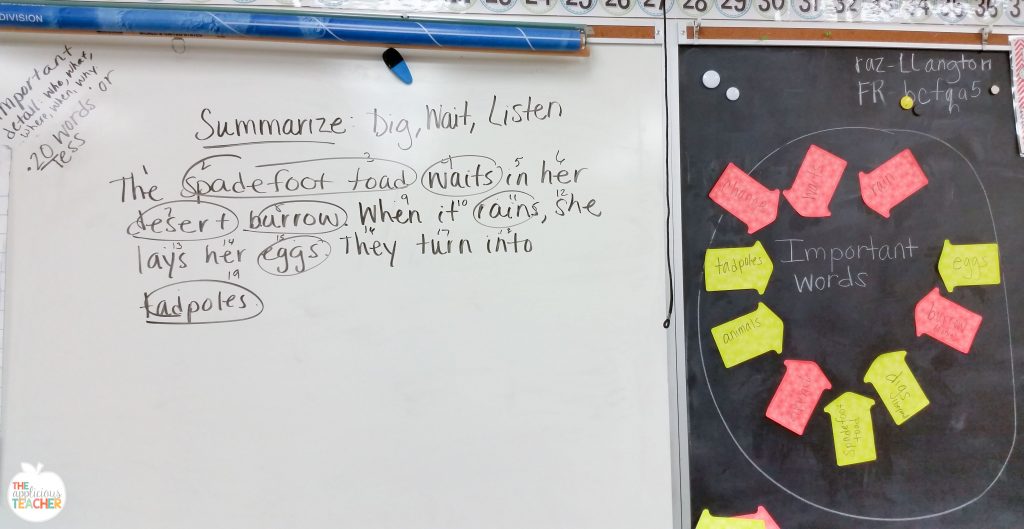
Here’s an in-action example of this part of the routine. After reading a text about how desert toads grow and change, I used these fun arrow shaped post it notes to write down the words students told me they thought were important from the text. These exact sticky notes were in the clearance section of Target’s office supplies, but these on Amazon are similar.
I like to share a little secret with students about important words from a text. Often students think EVERY word from a passage is important. Don’t get me wrong… we want our students to read ALL the words in the text… but not all of the words are important. To combat this assumption, we discuss how authors will bold, highlight, or italicize key words in a text. I also show students how “long words” are important because the author wants the reader to understand the proper terms as they are used in the writing. Another trick is to tell them to think about the words they would HAVE to use if they were retelling the story. It’s surprising how all of sudden a student who was writing down every word from the page starts to edit their list. LOL! #nijiateachertrick
20 Word Summary
Ok, students now have a list of the important words from a text. You could stop there…. after all writing the most important words is a type of basic summarizing. But I like to have my students actually come up with a summary. In steps the “20 word Summary.” Now, I can’t take credit here on this part of the routine I am sharing with you. Part of this routine was originally introduced to me by the ever talented teacher and fellow educational blogger, Tamara Russell.
So what is a 20 word summary? Simply put, it’s retelling a text using only 20 words. Seems simple enough… but man-oh-man can it be challenging! Here’s how I help my students along with their 20 word summaries. First, we discuss that a summary should cover these 5 important things: who, what, where, when, and why. Then, I model for students how to incorporate the words we brainstormed earlier to actually summarize our desert toad text.
Here you can see I wrote a summary that had 20 words or less. I circled the important words that I used from our brainstorm earlier. Seems simple enough, right? Well… believe me, it is not so simple. Students want to retell EVERY LAST bit of detail from a text. They want to include every nook and cranny. To combat that… you limit them to only 20 words. This keeps the summary to only the most IMPORTANT details of a text. (Main idea anyone?!)
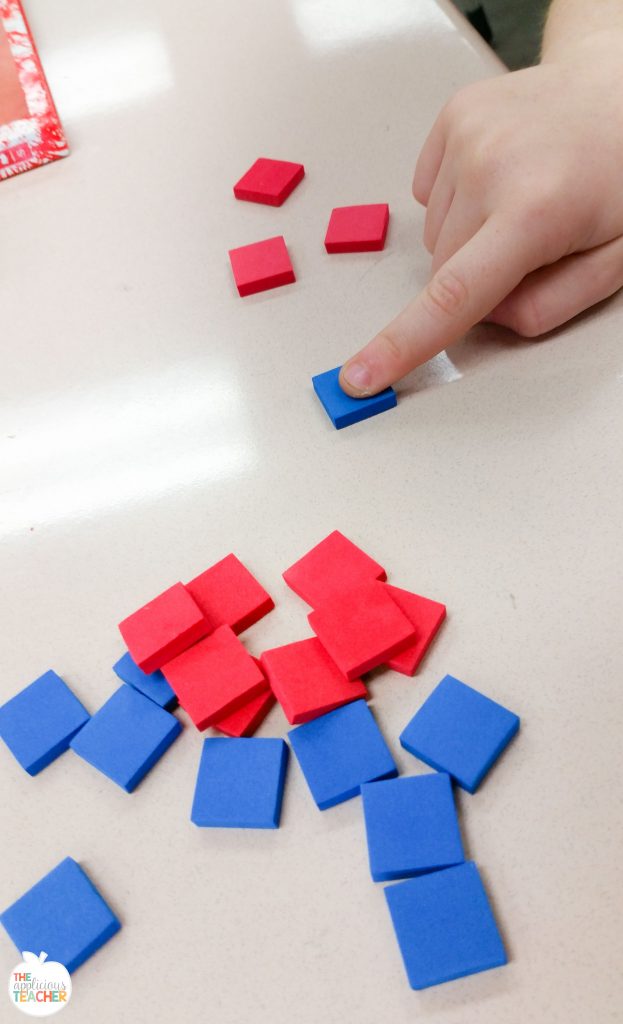
To practice their summaries, first have students work only verbally. (Thank you, Tamara!) This way, students aren’t erasing, rewriting, and getting frustrated with their short summary. In pairs, each student received a baggie of 20 counters. (Have a student who finishes early make up the baggies for you!) These counters were to help the kiddos keep track of their verbal word count. As they retold the summary, they moved a counter. If they ran out of counters before their summary was completed, they had to start over and narrow down their retell.
While students work on their retells, I like to walk around and spot check, assist, and monitor. This is a chance for kids to do the work so I try not interfere with the thinking that’s happening. I’ll also model how a partner can coach their buddy through the process. I love it when our friends help each other so anytime I can take the teaching load off my shoulders and put it onto a student’s, I’m all about it!
Once a group finally had their 20 word summary down verbally, I’d walk over and spot check together. If they’re able to squeeze in all that information into a summary, I stop the class and have them share! The students LOVE being able to “show off!” as my example.
Check out this quick video of one of my cuties using this strategy!
You can totally stop here. I mean, they’ve got it right? No need to go further…. but I do like to have my students actually write down their summaries because let’s be honest… the majority of tests are not verbal answer based, but written answer base. The easy part is is that now that students know their summaries and they are only 20 words long, they are more than willing to write it down because hey… it’s only 20 words, right? This little summary is saved in their Reading Response Journals.
So this is just one of my favorite ways to help students summarize in the primary classroom. Want to try this strategy in your classroom? Be sure to sign up below and snag a little free resource to help you get started!
Snag This Resource!

Subscribe to our newsletter and get this sample pack FREE!
Success! Hurry! Check your email to confirm your subscription.
