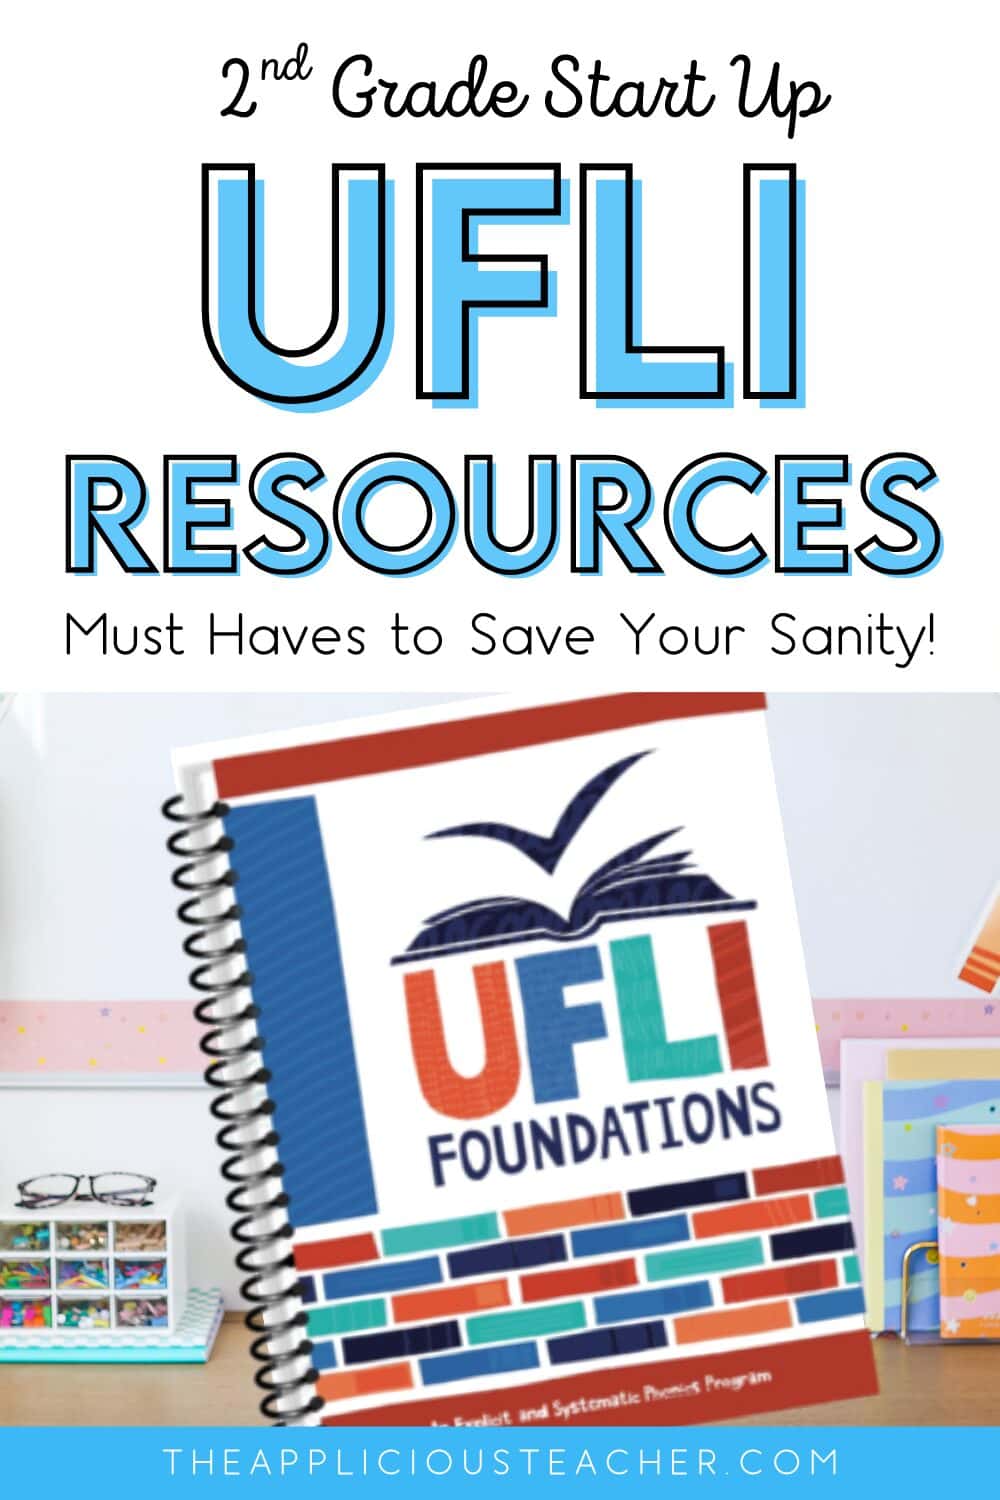
Teaching UFLI in 2nd grade? It’s a game-changer, but let’s be real, it can also feel like a full-on juggling act. Between the magnetic letters, slide decks, sound walls, and making sure your students are actually engaged, it’s a lot. 😅
After a full year of using the UFLI Phonics program in my second grade classroom, (and for two years prior in small group!) I’ve made tons of mistakes, but also learned a thing or two that’s working for me AND my students. So today, I’m sharing some practical teacher tricks and UFLI resources that make the whole routine run a little bit smoother. If you’re ready to save time, stay organized, and maybe actually enjoy UFLI time, these tips are for you!
Tips for Using UFLI in your classroom!
Please note this post contains affiliate links. If you follow my links, please know that I make a very small commission from your purchase. There is no cost to you, but this extra coinage allows me to continue creating free resources and writing awesome content for you!
Must-Have UFLI Resources- Quick Links
No time to read the whole post, but want to quickly grab a few of my must-have UFLI resources for implementing UFLI in your classroom? Check out the links below!
Using UFLI in your Second Grade Classroom
Before we get into it, I want to add a clarification. I feel like this goes without saying, but the most important thing you’ll need to implement this program successfully? The manuel and the slide decks.
These are *key* in making sure your instruction stays systematic. Hopefully, your district purchased your UFLI manual for you. But if not, you can grab it here. Also, be on the lookout for versions that are used in the FB groups.
In addition, the program includes slide decks for every lesson. These can be found on the UFLI toolbox page. Also, teacher tip: save the toolbox to your bookmarks as this is the place you will go every day!
Now, let’s get into those other must-have UFLI resources!
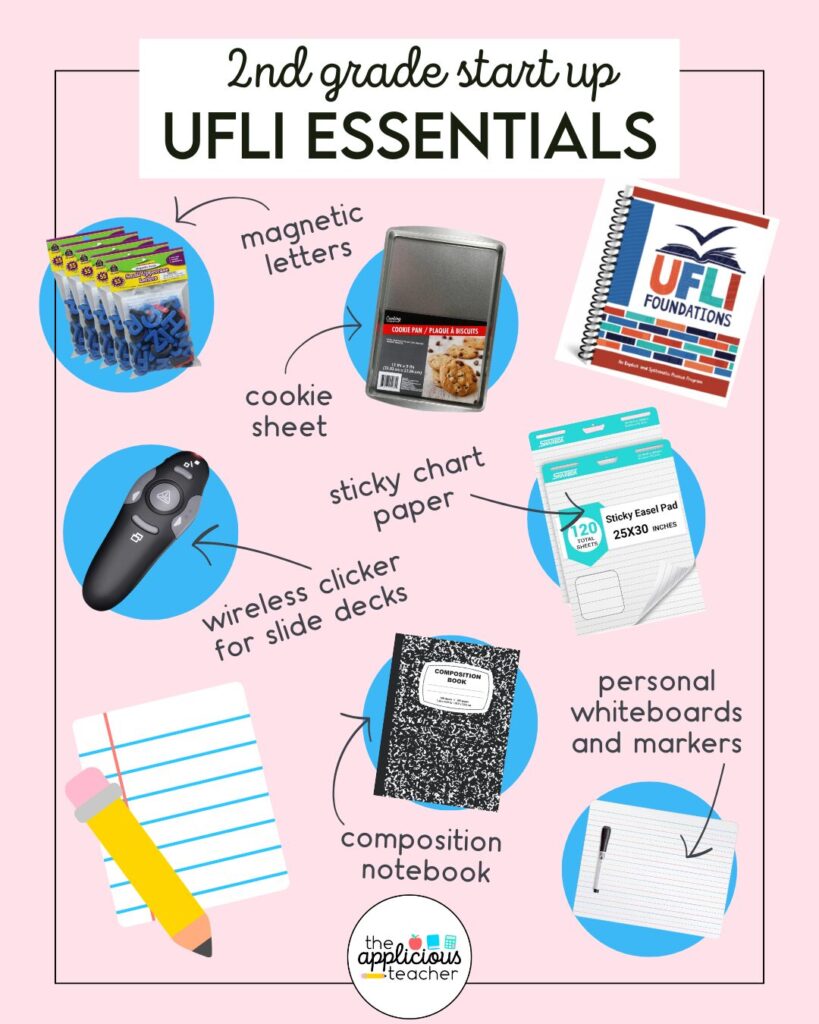
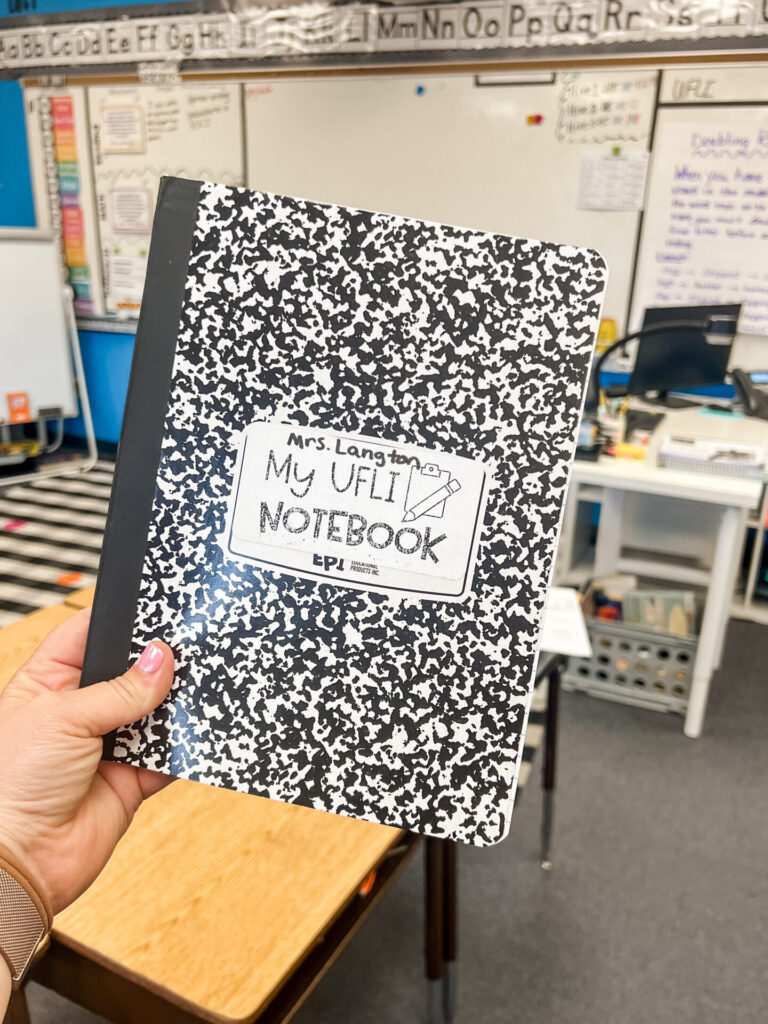
Tip #1 Use a Notebook
UFLI includes a few key writing components. It is suggested to complete these parts on a whiteboard. So much so, that my school purchased mini whiteboards AND markers for us this school year.
But here’s the thing: research has shown that writing improves memory retention. And even more specific: writing on paper. (See the article here!)
So, this past school year, I moved away from the whiteboards and replaced it with a notebook. I had stacks of composition notebooks, so it was easy.
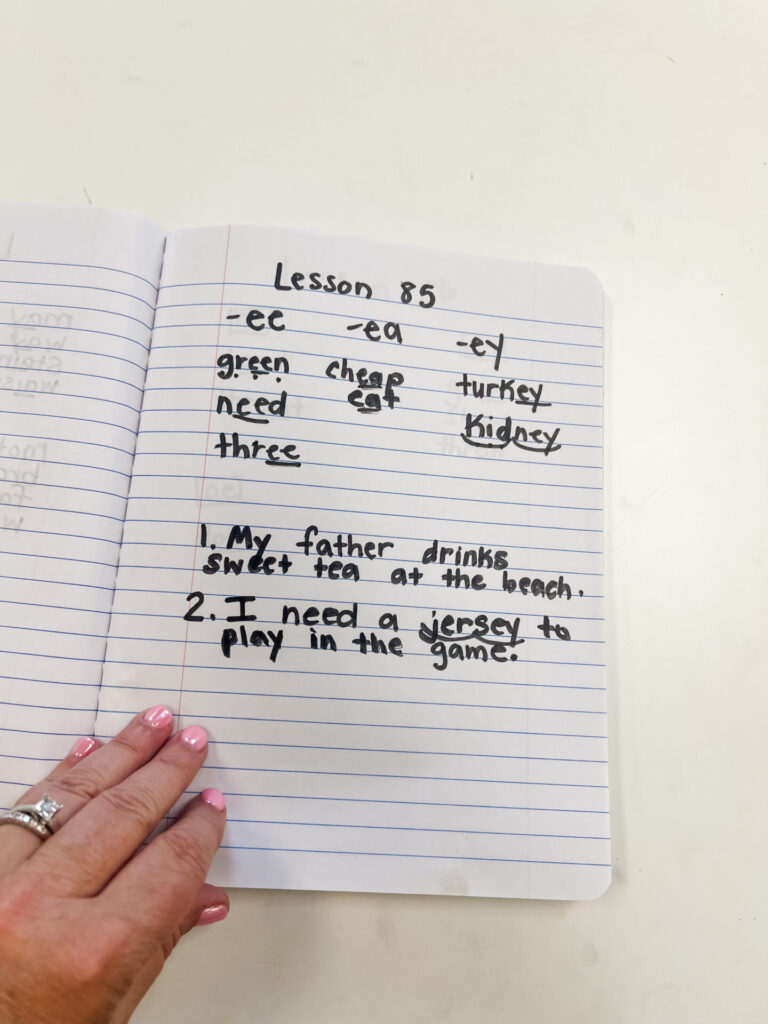
Now, we put every writing portion of our lessons in this notebook. Nothing fancy, but so much easier to go back and review!
Tip #2 Magnetic Letters and Trays
If you’ve been in any of the FB groups, then you know that magnetic letters and trays are a MUST UFLI resource when it comes to implementing this program. This is the “multi-sensory” part of the program that makes it work so well for students with learning disabilities like Dyslexia.
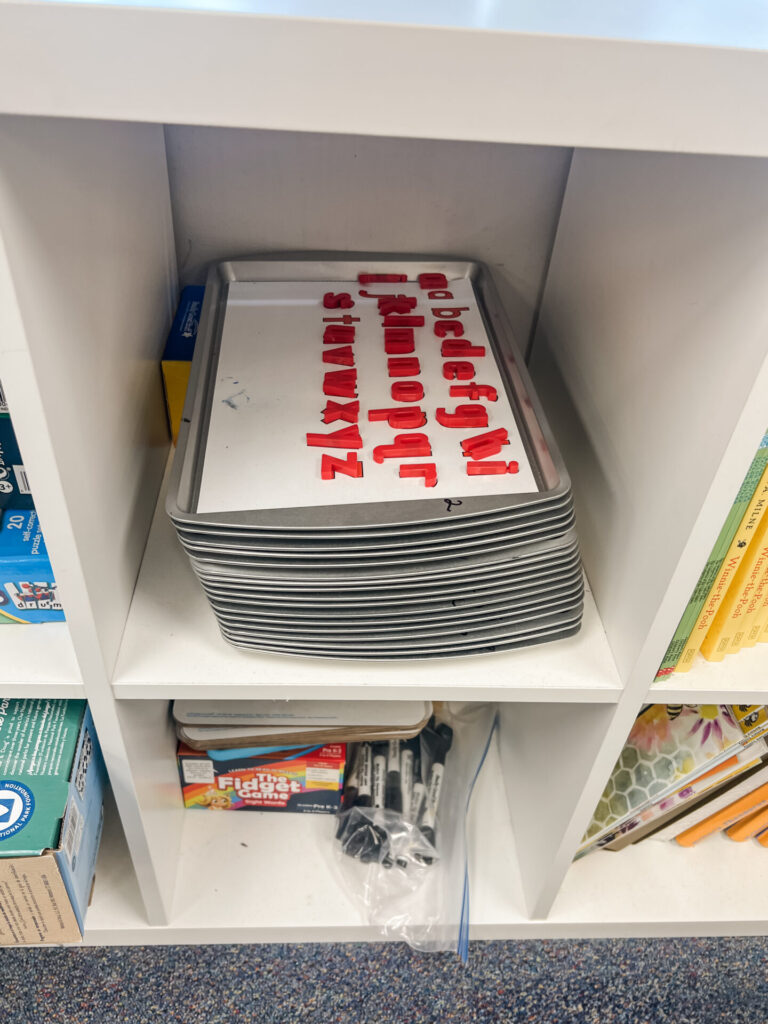
So, for successful implementation, it is suggested to have a class set of letters and trays. My district purchased cookie trays at The Dollar Tree.
Then, you’ll need some magnetic letters. There are a few options:
You can add a work mat to the top of the cookie tray so students know where to place their letters. Here is a link to the printable letter tray mats. Some people say not to laminate the mat. Ours were laminated and then stuck onto the mat with glue dots. This worked well for us, but my school uses cheap lamination. I do not suggest using the 3M lamination sheets to laminate, as the letters won’t stick if the lamination is too thick.
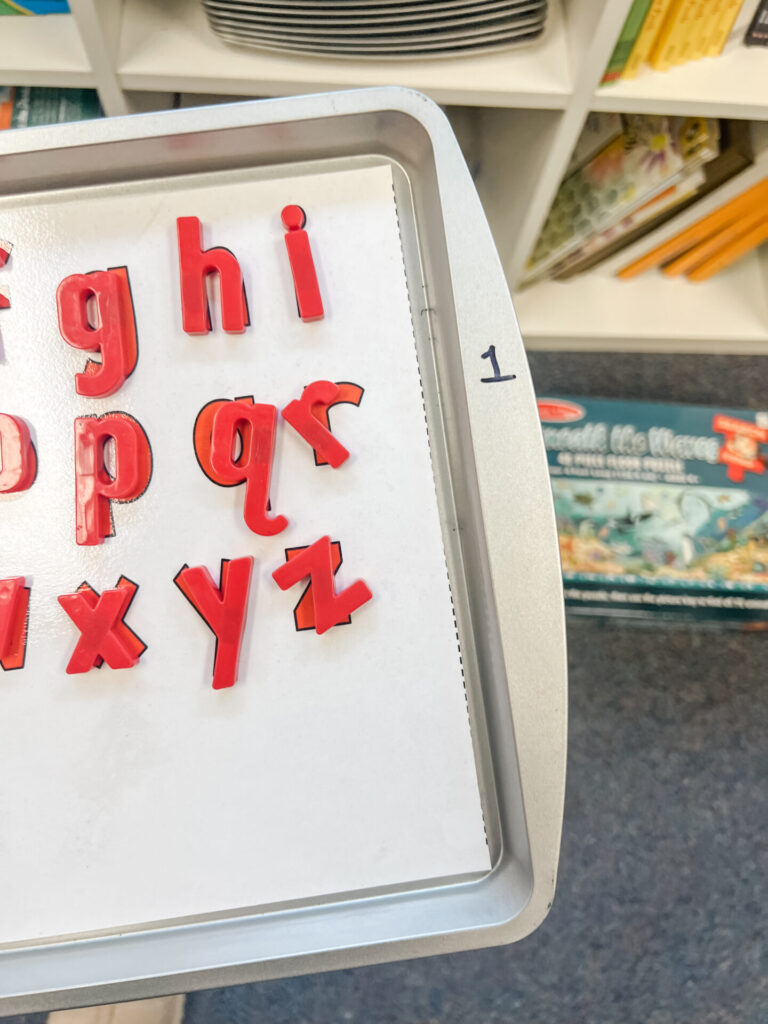
A couple of suggestions on these letter trays:
- Buy extra letters as some WILL GET LOST! I tried soooo hard to keep letters on trays, but the truth is, you’re working with kids, and stuff gets lost. Buy an extra pack or two so you’ll have some replacement letters.
- Number your letter trays and assign each student a tray. Now, there’s much more accountability for keeping the tray and numbers nice!
- Store them somewhere where students can easily access them. We kept ours in a cubby at the back of the classroom. To hand them out, I just called students by number to get their trays. Then, when we were done, students reset their trays, then I called them again by number to bring the trays back to the cubby. This worked well, and my students called this time in the program “word cookies,” and at the end, we had to place the trays in the oven to bake. LOL!
Tip #3 Limit Reviews
Ok… this next tip is a little unorthodox, but I’m going to say it: limit your grapheme/phoneme reviews.
There is a section at the beginning where you review letters and sounds. This is great and is part of why the program works so well for students with learning disabilities: that daily reminder is why this program is considered systematic.
The issue? TIME!
Having students complete the auditory drill every day is very time-consuming (especially in second grade, where there are like 5-7 letter combinations for some of the sounds)
My suggestion: limit this part to only twice a week.
Please don’t shoot me, Dr. Holly Lane!
Students want to do well on this section, and although it is suggested to keep a perky pace, it definitely takes longer than the suggested 3 minutes to complete! So… sometimes we limited our sounds, OR I would skip it altogether.
Tip #4 Add in Engagement Games
One of the reasons UFLI is considered so effective is the fact that it follows the same routine day after day, week after week…
But, after a few weeks… it can get, well… DULL!
There, I said it.
So, here are a few ways we spiced things up this past year in an effort to keep engagement going!
- Quiz the Teacher-Fun little play on the review section at the beginning of the lessons. To play, display the powerpoint. The teacher turns her back to the screen. Then, have students say the sounds that are on the screen. The teacher then guesses what letters are making the sounds. We played this atleast 3 times a month! Watch this game in action here!
- Battleship-Spice up the roll and reads with this game. You can play as a whole class or in small group, or even buddies. I suggest introducing this game as a class or in small group. To play, students use the roll and read as their board. Then, they choose 4 words on the board (2 sets of words next to each other). Then, roll the dice, and read the words in the row. If your word is called, students yell: I’m hit! Play until all words or “ships” are hit. Here’s a great instructional video!
- Make sentences with Roll and Reads- Let’s be honest, handing out dice every week can spell disaster becuase there is is nothing more tempting then to throw dice AND NOT PLAY the game. With this egagement strategy the teacher rolls a dice and the students choose one word from that column to write in a sentence. Time them to make it a game!
- No Dice Quick Reads with the Roll and Reads– Another easy one to play! Give every student a Roll and Read board. Then, set a timer for a minute. See how many words students can read in that time. Then, repeat, seeign if students can beat their number!
- Pink Cat Games- This game site has a few free phonics based games you can play with your class or in small group! There is also a paid subscription section where more games are available.
Looking for more easy engagement ideas? Check out this video on TikTok! (Not my video!)
Tip #5 Include Some Visuals for Review
The slide decks include a grapheme review section where students are shown letters or letter combinations, and they are supposed to produce the sounds relating to what is shown. This, of course, works, but I found over time that my students were bored.
To help increase engagement and memory, I started using these picture phonics flash cards from Naomi over at Read Like a Rockstar. I purchased all three sets, and as we learned more sounds, I added to the pile. Students would ask me to review with the cards. At the end, we had a TON to review, but they didn’t mind!
Tip #6 Anchor Charts for Sound Review
Another UFLI resource? Anchor charts!
I found throughout the year that students needed more support than just the sound wall with words that included our focus sound for the lesson.
That’s when I started creating anchor charts for each lesson. They are the perfect way to review the words and to introduce the sounds as students make connections to words they already know that include the target sound.
I’d display the anchor chart for the lesson time and we would add words as we learned more and more words. Then, when we got to the review lessons, it was great to pull back out those anchor charts to review all the sounds and words we learned!
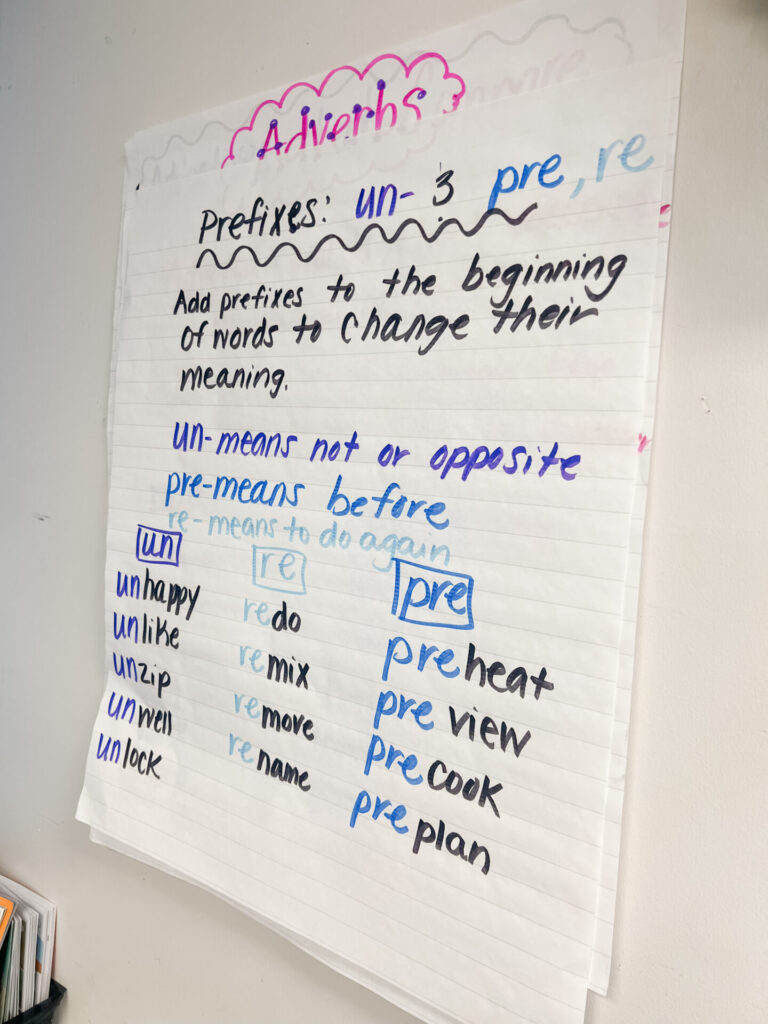
I preferred the sticky anchor chart papers, but any anchor chart paper will work!
Tip #7 Say Goodbye to the Online Blending Board
So, there is a section in UFLI where you work to complete a blending drill. Basically, you work to build words together as a class, and change letters out to blend and make new words. UFLI has a blending board available online that you are supposed to use.
Honestly… I HATE IT!
It is not the most user-friendly thing. If you mess up, you have to completely start over (no back button!) and you need to prepare the board ahead of time (which means extra prep for me!😝)
So… I ditched the board.🤫
Instead, when we get to that point in the lesson, I quickly insert a blank page in the slide deck. Add a text box with 140 pt text. (That literally takes 3 seconds!) Then, type the first word. We sound and blend the word, then I’m able to delete or insert letters to make the new word.
It is honestly so much easier! No separate section to have up, no extra prep needed.
Tip #8 Stretch Out Some of Those Lessons
The UFLI scope and sequence is pretty fast. You complete two lessons a week, and a review and assessment day on the fifth day.
Although the creators of UFLI claim that the interleaved practice means students have time to review and practice, the truth is that the provided practice isn’t enough. Some lessons need more time for students to process and practice.
So, we started occasionally stretching lessons over three days instead of two. We didn’t do this for every lesson, but for the key lessons like digraphs and tricky vowel teams, we found our students just needed more time to practice with the focus on those sounds.
Don’t worry- there is PLENTY to do in those three days. Although UFLI is supposed to be completed in 30 minutes a day, the truth is you could easily spend over 45 minutes to an hour working.
Tip #9 Clicker
As I stated before, there are matching slide decks in addition to the manual. These slide decks are going to become your best friend!
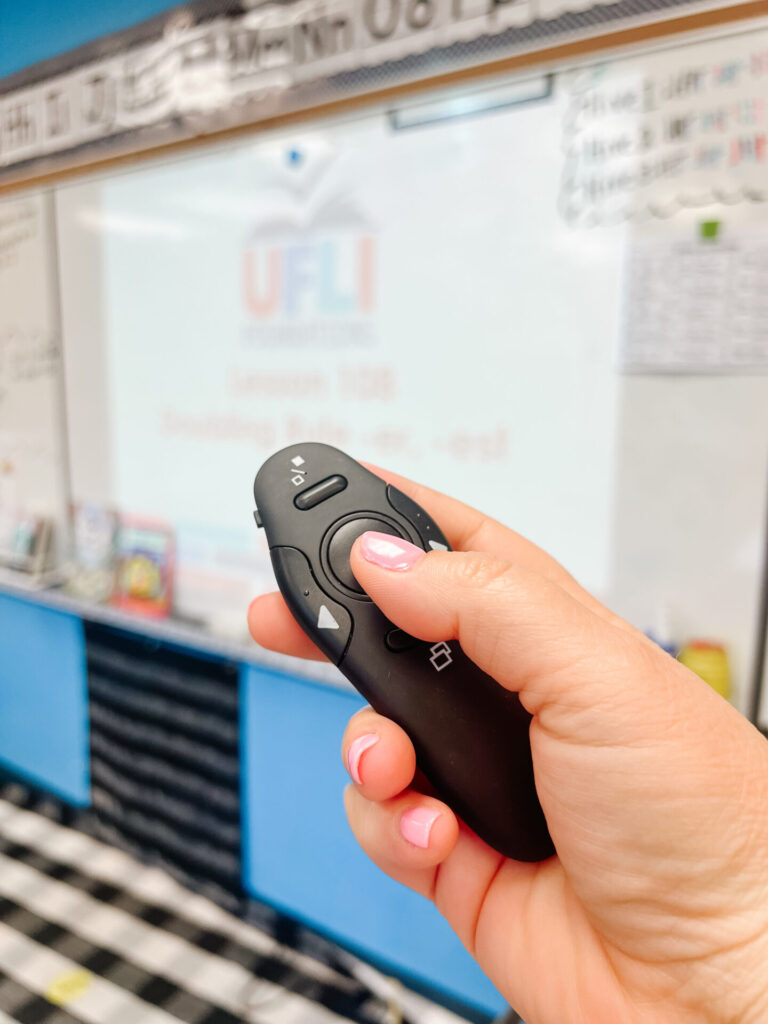
But you don’t want to be chained to your desk every day, pressing Enter to move to the next slide.
That’s why a simple Bluetooth clicker is a must! This is the one I have from Amazon, and it has worked like a champ!
It even has a pointer light that I use when blending and reading words/sentences.
Tip #10 Preview and Read
There are several parts in the day one and day two lessons where students are decoding and reading. At the beginning, it’s important to do this work modeled, then together as a class.
But, after a while, you need students to work a bit more independently.
So, for my class of second graders, I found using the “preview and read” strategy worked well.
To complete, students “preview” the text on the board. During this time, they are sounding and blending the words or sounding and reading the sentences. After the preview time, students then read the sentences or words with me in choral response.
We also do this with the passages before group reading.
Tip #11 Print Stories at 90%
Remember, we started keeping our UFLI activities written in a notebook instead of writing on a whiteboard. So, I also started adding the decodable stories to the notebook.
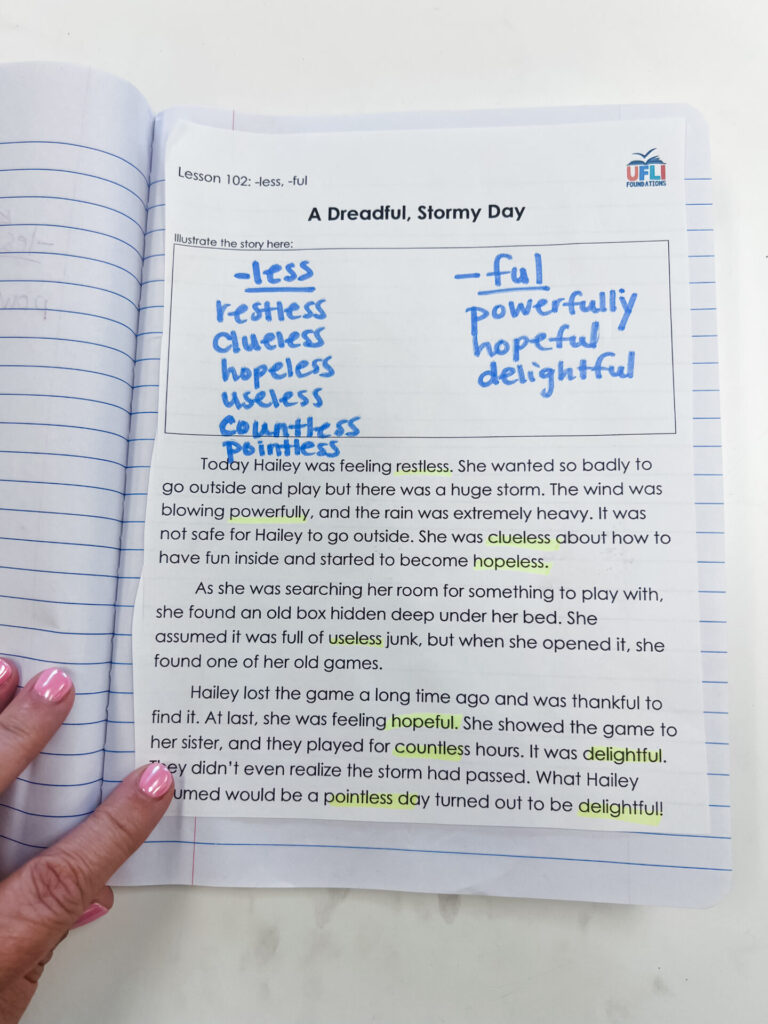
To do, print the stories to 90%. Then, students can trim off the excess and glue the page right into their notesbooks. This made it super simple to go back and read through during centers, early finisher work, or small group time.
Tip #12 Skip It!
Come here… I’ve got something I need to whisper to you.
It’s ok to skip some parts, some times.
UFLI is A LOT! The routine takes time to build.
But, on those days where things are taking longer to complete… it’s ok to skip it this time. Areas I skipped the most during my whole group instruction: auditory drill and decodable passage. Other times, I would shorten the section.
The goal is ALWAYS to try to do as much as possible, but you’ll soon discover that you need to keep an eye on your time and that sometimes means shortening or deleting sections for that day.
I will say, if we did skip the passage reading as a class, I would have students complete it during our small group rotations. But that was often after lots of whole-group practice!
Tip #13 Join the FB Groups
Honestly, I should have started with this one…but seriously, join the FB groups!
Here are a few of my most frequented groups:
- UFLI Foundations Community- this is the official FB group of UFLI Foundations, so be prepared for interactions with staff from the college, including the UFLI queen herself, Dr. Holly Lane! Perfect for asking curriculum questions.
- 2025 UFLI Resource Sharing- perfect for looking for resource ideas to complement your UFLI routine.
- UFLI Inspired Ideas- Another resource sharing FB group.
13 Tips for Implementing UFLI in Your Classroom This School Year!
UFLI can feel like a big lift at first, but once you find your rhythm, it becomes such a powerful part of your literacy block. These tips and UFLI resources have saved me so much time and stress, and I hope they help you feel a little more confident and a lot more organized moving forward with this program.
Got a favorite UFLI hack that’s not on this list? Drop it in the comments! I’d love to add it!
Other Amazing Ideas
Check out these other amazing ideas!